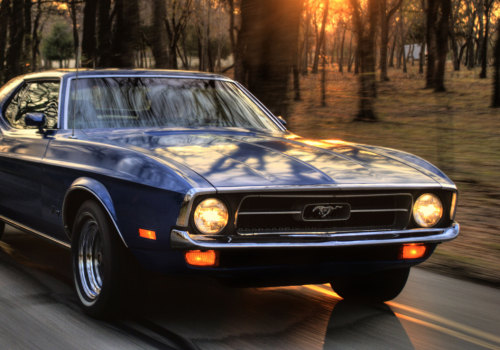
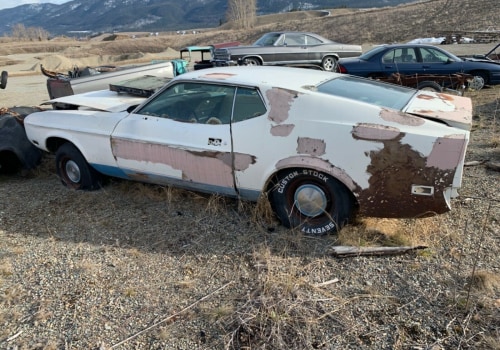
- Restoring a 1972 Mustang Sprint Car
- Exterior Restoration for a 1972 Mustang Sprint Car
- Replacing Trim Pieces, Badges, and Lights
Replacing Trim Pieces, Badges, and Lights on a 1972 Mustang Sprint Car
Find out how to restore the exterior of your 1972 Mustang Sprint Car by replacing trim pieces, badges, and lights. Learn what tools you need and how to properly install them.
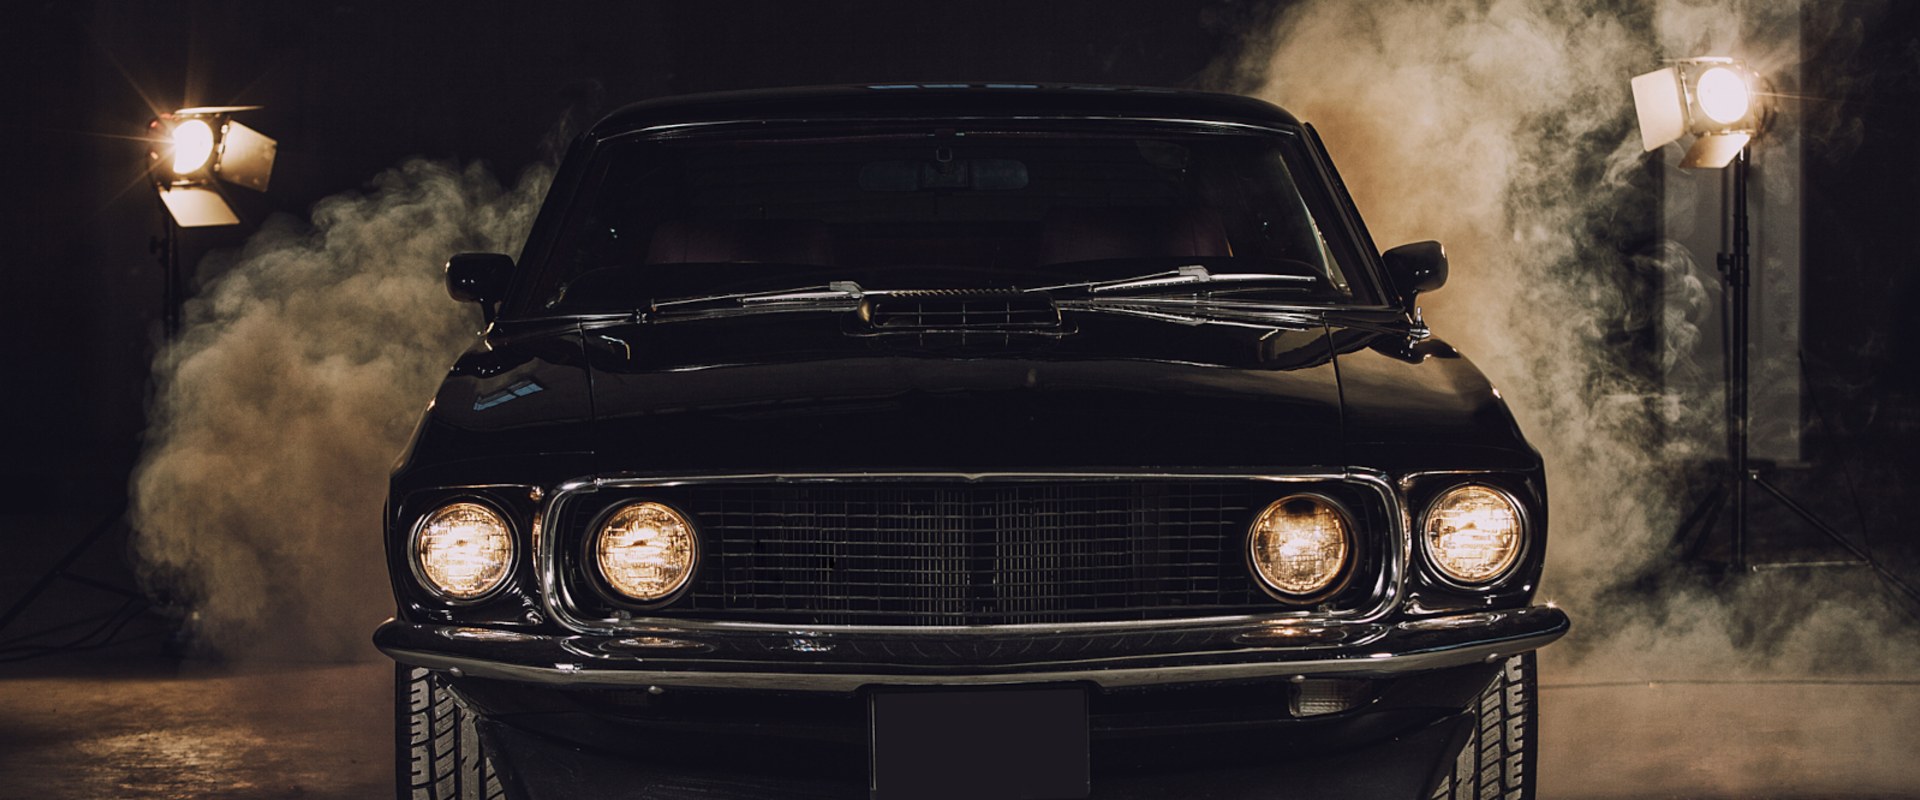
Restoring a 1972 Mustang Sprint Car is no small feat. Not only will you need to source the right parts, you'll also need to be prepared to spend a significant amount of time and energy relocating your carrelocating your car and replacing trim pieces, badges, and lights. But don't worry - with a bit of patience and the right tools, you can give your classic car a facelift in no time. This article will provide a comprehensive guide to replacing trim pieces, badges, and lights on a 1972 Mustang Sprint Car. We'll cover the basics of what to look for when sourcing parts, the tools and materials you'll need to do the job properly, and the step-by-step instructions for installing your new trim pieces, badges, and lights. Whether you're a first-time restorer or an experienced veteran, this guide will help ensure that your exterior restoration project is done correctly and looks great. When it comes to relocating your car and replacing trim pieces, badges, and lights on a 1972 Mustang Sprint Car, you will need a few essential tools. For trim pieces, you will need a Phillips screwdriver or screw extractor set.
For badges and lights, you may need a flat-head screwdriver or a soldering iron. You'll also need needle-nose pliers. Once you have the tools you need, you can begin the process of removing the old trim pieces. Start by removing the screws that are holding the trim pieces in place.
Once you have all the screws removed, you can gently pry off the trim pieces with your hands or with the help of needle-nose pliers. Next, you'll need to remove any badges or lights that are on the car. This can be done with a flat-head screwdriver or a soldering iron if the badges or lights are wired in. Once they are removed, you can start the process of installing the new ones. For badges and lights, it is important to pay attention to what type of fittings the new ones require.
They may require different types of screws or wiring than the original ones. If they require different wiring than the original ones, you may need a soldering iron to get the job done. Once all of the new parts are installed, you can move on to replacing the trim pieces. This is done by lining up the new trim pieces with the holes in which they will be placed and securing them with screws. Make sure that all of the screws are tight so that they don't come loose over time. Lastly, you should test out all of the new parts to make sure that they are working correctly.
This includes turning on any lights or testing out any other functions that your new parts may have included. Once everything is working correctly, your 1972 Mustang Sprint Car will be ready for its exterior restoration.
Tools Needed for Replacing Trim Pieces, Badges, and Lights
When it comes to replacing trim pieces, badges, and lights on a 1972 Mustang Sprint Car, you will need a few essential tools. For trim pieces, you will need a Phillips screwdriver or screw extractor set. For badges and lights, you may need a flat-head screwdriver or a soldering iron.You'll also need needle-nose pliers.
Removing Old Trim Pieces
Start by removing the screws that are holding the trim pieces in place. To do this, you will need a screwdriver or a set of pliers. Be sure to take your time when removing the screws, as you don't want to damage any of the trim pieces.Once you have all the screws removed, you can gently pry off the trim pieces with your hands or with the help of needle-nose pliers. Make sure to be gentle when doing this, as you don't want to damage any of the trim pieces or the paint on the car.
Testing New Parts
Before installing any new parts, you should test them to ensure that they are functioning properly. This includes turning on any lights or testing out any other functions that your new trim pieces, badges, and lights may have included. Start by checking the bulbs in the lights to make sure they are all working. If any of the bulbs are not working, you can replace them with new ones.Additionally, if the lights require wiring, you should make sure that all the connections are secure. Check the badges and trim pieces as well to ensure that they fit properly. Make sure that all of the pieces are securely attached to the car and that they are not loose or falling off. If necessary, use additional adhesive or screws to ensure a secure fit. Finally, turn on the car and test all of the new parts. This will help you identify any issues that may arise from incorrect installation or faulty parts.
Installing New Parts
Installing New PartsWhen restoring a 1972 Mustang Sprint Car, it is important to pay attention to the type of parts being replaced.Replacing trim pieces, badges, and lights can be a tricky task. It is important to ensure that the new parts are compatible with the existing fittings. For badges and lights, it is important to pay attention to what type of fittings the new ones require. Be sure to check the part specifications before making any purchases. It is also important to make sure the new parts fit securely in order to maintain the car's safety. When replacing trim pieces, it is important to make sure they are of a high quality.
Poorly made trim pieces can lead to rusting and other damage over time. It is important to take your time and measure the pieces accurately before making any purchases. If you are unsure about how to do this correctly, it is best to consult a professional. Replacing trim pieces, badges, and lights can be a time-consuming task when restoring a 1972 Mustang Sprint Car. However, with the right knowledge and tools, you can successfully replace these parts and get your classic car looking as good as new.
Removing Badges and Lights
Replacing trim pieces, badges, and lights on a 1972 Mustang Sprint Car is an important part of restoring the car.Removing badges and lights can be done with a flat-head screwdriver or a soldering iron if the badges or lights are wired in. To start, use the flat-head screwdriver to unscrew any screws or bolts that are holding the badge or light in place. Once the screws have been removed, you can carefully pull the badge or light away from the car body. If the badge or light is wired in, you may need to use a soldering iron to disconnect it from the car's electrical system.
Once all the badges and lights have been removed, it is important to inspect them for any signs of damage or wear. If there is any damage, you may need to replace the badge or light before proceeding with your restoration. Otherwise, you can move on to cleaning and painting the area where the badge or light was located.
Replacing Trim Pieces
Replacing trim pieces on a 1972 Mustang Sprint Car is an important step in restoring the vehicle to its former glory. In order to properly replace the trim pieces, you'll need to line up the new trim pieces with the existing holes in which they will be placed and secure them with screws.This can be a tricky process, so it's important to take your time and make sure that the trim pieces are lined up correctly before securing them. When replacing the trim pieces, you'll want to start with the smaller pieces first, such as the badges and lights. These smaller pieces are easier to fit into place and can help you get a better idea of how the larger trim pieces should be lined up. Once the smaller pieces are in place, you can move on to fitting in the larger trim pieces.
Trim Pieces
When it comes to replacing trim pieces, make sure that you have all of the necessary components for the job. This includes screws, washers, and nuts.You'll also need any additional parts needed for the specific trim piece you're replacing. For example, if you're replacing a badge, you'll need to make sure that you have a new badge or emblem for installation. Once all of the new parts are installed, you can move on to replacing the trim pieces. It's important to take your time when doing this as it's easy to mess up and end up with a misaligned trim piece. If possible, use a drill or screwdriver with an adjustable speed setting so that you don't over-tighten the screws or strip them.
Badges
Replacing badges and emblems is relatively easy when compared to replacing trim pieces.To replace the badges or emblems, simply unscrew or remove the old badge and place the new one in its place. Make sure that it is fitted properly before tightening down the screws or fastening it into place.
Lights
Replacing lights is a bit more involved than replacing badges or trim pieces. Depending on your vehicle, you may need to remove parts of the car's exterior in order to access the light fixtures. Once you have access to the light fixtures, you can remove them and replace them with your new ones.When doing this, make sure that all of the wiring is properly connected and that the bulbs are working correctly before putting everything back together. Replacing trim pieces, badges, and lights on a 1972 Mustang Sprint Car can be a difficult task, but with a bit of patience and some know-how, it can be done. Make sure that all of your parts are properly fitted and secured before putting everything back together, and your classic car will look as good as new!Restoring a 1972 Mustang Sprint Car can be a challenging job, but with the right tools, some patience, and attention to detail, replacing trim pieces, badges, and lights can be an easy and rewarding process. It's important to ensure that all of the new parts are properly installed so they look great and function properly.